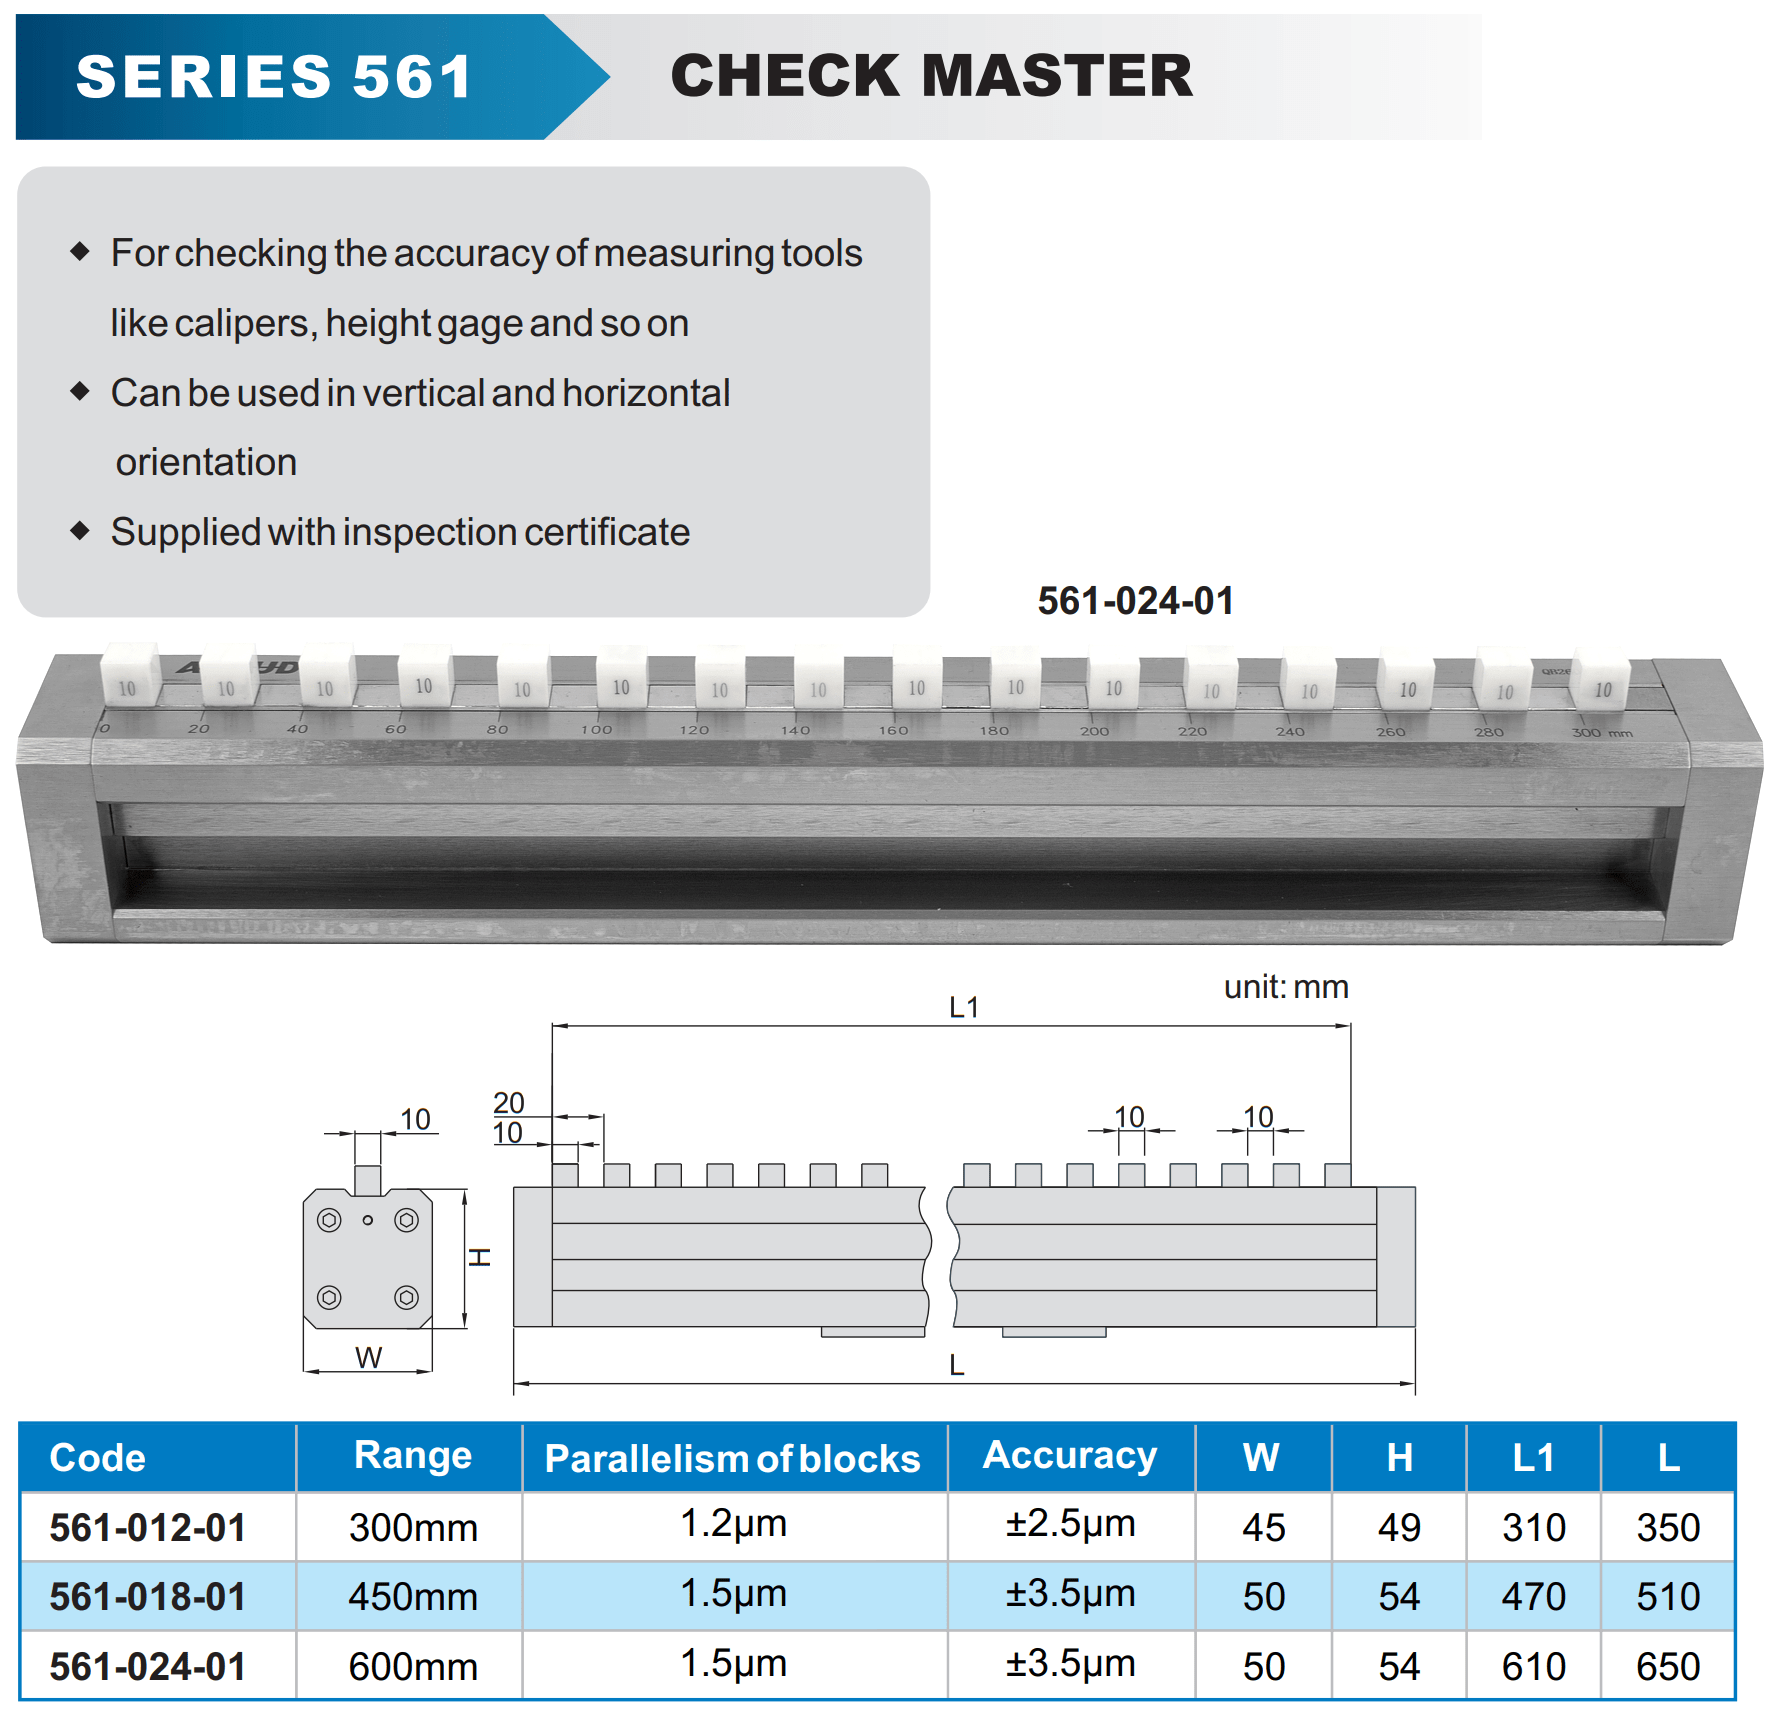


- Stock: In Stock
- Brand: ACCUD
- Model: AC561-012-01
- Weight: 5.44kg
- Dimensions: 158.00cm x 446.00cm x 446.00cm
- SKU: AC561-012-01
- UPC: 6009515871888
SERIES 561
A check master (or gauge block check master) is a precision reference tool designed specifically for verifying and calibrating the accuracy of various measuring instruments such as calipers, height gauges, micrometers, dial indicators, and other dimensional measuring tools. By using a check master, you can ensure that your measurement instruments are providing accurate and consistent readings over time, which is essential for maintaining quality control in manufacturing, machining, and other industries.
A check master is a valuable tool for anyone involved in precision measurement, ensuring that their instruments are accurate, reliable, and calibrated according to recognized standards.
Benefits of Using a Check Master:
- Ensures Accuracy: Regular checks with a check master help maintain the accuracy of measuring tools, reducing errors in production or inspection processes.
- Minimizes Downtime: Quick verification and calibration of tools using a check master help to avoid lengthy downtime due to faulty measurements or tool readjustment.
- Cost-Effective: By identifying out-of-tolerance measuring tools early, costly rework or scrapping of parts can be avoided.
- Easy to Use: The design of a check master allows for simple, quick checks without the need for extensive training or complex setups.
Applications of a Check Master:
-
Calipers:
- Check masters allow calipers to be calibrated by comparing the displayed measurements against the known step heights or blocks of the check master.
-
Height Gauges:
- Height gauges are checked by placing the gauge’s measuring probe on the different reference surfaces of the check master, ensuring that the gauge is accurate throughout its measuring range.
-
Micrometers:
- Check masters can be used to calibrate micrometers, ensuring that the micrometer reads correctly at specific measurement points.
-
Dial Indicators:
- A check master can also be used to verify the accuracy of dial indicators by comparing their readings against the reference surfaces or dimensions provided by the check master.
-
Precision Measurement in Industry:
- Check masters are critical in industries like aerospace, automotive, manufacturing, and precision engineering, where maintaining tight tolerances and ensuring accurate measurements are essential.
Key Features of a Check Master:
-
Precision Reference Standards:
- The check master includes high-precision reference blocks or surfaces that serve as a known standard against which measuring tools can be checked.
- The reference values are certified and traceable to international measurement standards (such as ISO), ensuring the utmost accuracy.
-
Material and Durability:
- Made from durable, high-quality materials like hardened steel or carbide, the check master ensures long-term stability and wear resistance.
- Some models use ceramic or chromium carbide blocks for enhanced resistance to wear and corrosion, particularly in harsh environments.
-
Versatility:
- Check masters are designed to be used with a wide variety of measuring
tools, including:
- Calipers (digital, dial, and vernier)
- Height gauges
- Micrometers
- Dial indicators
- Bore gauges
- The tool typically comes with multiple reference points or steps at fixed intervals, allowing the user to check the accuracy of different ranges of the measuring instrument.
- Check masters are designed to be used with a wide variety of measuring
tools, including:
-
Accuracy Verification:
- The check master provides certified reference dimensions for verifying the accuracy of both the upper and lower measuring limits of instruments.
- Calibration can be done at multiple points along the range of the measuring tool, allowing users to detect potential inaccuracies or deviations over the full measurement range.
-
Calibration Process:
- To verify the accuracy of a measuring tool, the instrument is compared directly against the certified dimensions of the check master.
- For example, when calibrating a caliper, the caliper jaws can be opened to the exact reference lengths provided by the check master, and the reading on the caliper is checked against the actual known value.
-
Built-in Steps and Heights:
- Many check masters are designed with stepped surfaces or multiple stacked blocks of different heights. These provide several preset reference points, such as 5 mm, 10 mm, 15 mm, etc., or the equivalent in inches for imperial tools.
- These stepped blocks allow users to check different ranges of the measuring tool in one device without needing multiple separate gauge blocks.
-
Storage and Handling:
- Check masters are typically stored in protective cases with individual compartments to ensure the reference surfaces are not damaged or contaminated.
- To maintain accuracy, the check master should be handled with care, using gloves to avoid transferring oils or debris that could affect the precision.
-
Types of Check Masters:
- Single-Step Check Masters: These have one fixed height or dimension and are used for basic checks or spot calibration.
- Multi-Step Check Masters: These offer multiple preset heights or dimensions in one tool, making them versatile for checking instruments with a wide range of measurement capabilities.
- Calibration Kits: These often contain multiple blocks or steps to calibrate tools across a broad range of dimensions.
Unlimited Blocks, Tabs or Accordions with any HTML content can be assigned to any individual product or to certain groups of products, like entire categories, brands, products with specific options, attributes, price range, etc. You can indicate any criteria via the advanced product assignment mechanism and only those products matching your criteria will display the modules.
Also, any module can be selectively activated per device (desktop/tablet/phone), customer login status and other criteria. Imagine the possibilities.


